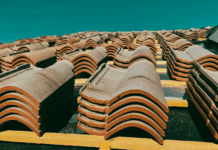
For a tiny house, bungalow, apartment, or huge commercial building, a simple thing like tile installation adds beauty to the building. There are different kinds of tiles manufactured. Therefore, one is able to find tiles with different colors, textures, and sizes available in the market. Installing tiles requires a lot of manual work effort. Doing everything manually puts an excess burden on the body. To make their work easier, tile installers always carry tiling accessories.
Tile installation is not just about cutting and placing tile. It requires a lot more work and decisions. Tile installation is like art. However, unlike painting, where a wrong stroke can make another piece of art, one wrong tile cut ruins all the efforts in the installation of tiles.
Tiling Accessories
Learn more about these tiling accessories to understand how they work and help tile installers in their professions.
-
Tile Cutter
Cutting tiles in the right size is a crucial part of tile installation. A manual tile cutter makes the tile cutting task easy. Tile cutters operate manually and are easy to handle.
-
Tile Nibblers
A manual tile cutter gives a perfectly straight cut. However, to give the tiles unique touches or patterns, tiles with straight cuts are not the greatest choices.
Tile nibblers give tiles irregular cuts that form unique patterns. Of course, the tile installers can get irregular cuts using a normal tile saw, but tile nibblers come in handy and make the work easy.
-
Drill Bits
For installing tiles near taps, switchboards, or anything that is not removable, installers need to deal with the situations by changing tiles. First, installers drill holes in the tile pieces for their right placements around these obstructions.
Tile installers most commonly use diamond drill bits used for wet drilling, which means that the drilling reduces the dust and noise.
-
Tile Leveler and Spacers
Seeing tiles placed at uneven levels gives an unfinished look. The professional tile installers use tile levelers to place the tiles at the required positions and maintain level.
To give tiles some pattern or design or even to just place tiles, there needs to be some space between tile pieces. Back in the days when tile installers did not have advanced tools, they used different things to give equal spaces between tiles.
With the tile spacers available in the market today, tile installers now use them to get required and equal space between pieces.
-
Electric Mixer
Cement mortar holds tiles together after their placements. However, mixing large amounts of cement by hand seems like a hard and never-ending task. This is where an electric mixer comes into place. The electric mixer gets the cement mixer ready within minutes.
-
Buckets
Since tile installers need cement while installing tiles to hold them together, they also need something to hold the cement itself. The cement mixture solidifies when dried. Removing a solidified mixture kept in a container is difficult.
Professional tile installers typically use rubber buckets to deal with situations like this. Rubber buckets make it easier to remove the mixtures, be it little leftover or solidified mixtures.
-
Tile Adhesive
As the name suggests, tile adhesive is used for placing tiles on walls or floors. It works similar to a cement mortar mixture, except it has more strength and lasts longer than cement.
Tile installers use different adhesive solutions for the placement of tiles at different places. However, sometimes in damp areas like bathrooms, adhesives are simply not enough, because they are water resistant but not waterproof. Therefore, in such places, installers must use waterproofing supplies like waterproofing membranes to prevent water from seeping into the tiles.
-
Tile Trowels
Tiles are fixed after a layer of cement is put over to keep tiles together in place. Cements are always leveled up to give them polished looks.
Professional tile installers use tile trowels to give tile installation a polished finishing touch.
-
Grout Floats
Grout floats are some of the important tools used by professional tile installers. Just placing tiles randomly makes it look uneven and unpolished. This is because gaps are present between the tiles.
The grout fills up those gaps and hold tiles together. Grout floats have rubber on them that helps to spread grout between the tile gaps.
Multiple rubber grout floats are available. There are different grout floats for different purposes — for example, for larger spreads or for filling up small corner gaps.
-
Knee Pads
Working as a tile installer requires a lot of movement, such as sitting down, moving around, squatting, and kneeling. This all-day continuous movement causes pain. Professional tile installers do not like to have any kind of pain obstructing their work.
Knee pads are very helpful while working. Along with preventing pain and protecting knees, they also help perform tasks easily.
Parting Note – Tiling Accessories
Whether you are a professional tile installer or a person installing tiles on your own, get the above mentioned tiling accessories to help you out in the installation process. Without these tools, your installation work makes you drained. Stopping work because of this will not be the best choice.
Find a Home-Based Business to Start-Up >>> Hundreds of Business Listings.


