")


Working from the comfort of your own home definitely has its perks. For starters, you get to make your own schedule, you save significant amounts of money on commuting, and you get to go to work in your pajamas. But if you are not careful and you don’t find a way to separate your personal life from your professional one, working from home can also have its downfalls.
When choosing a nontraditional working space, such as your home, you can easily fall into its traps, such as working more than you should, messing up your daily schedule, or procrastinating. But if you are able to sort things through and keep business and pleasure separate, being your own boss can be the most fulfilling experience.
One of the easiest ways to make sure you keep family and work separate is by setting up an area to serve as your designated home office. We have put together this step-by-step guide to help you get started, no matter if you only have a small room or an entirely separate annex to use.
Step #1: Pick a designated office area
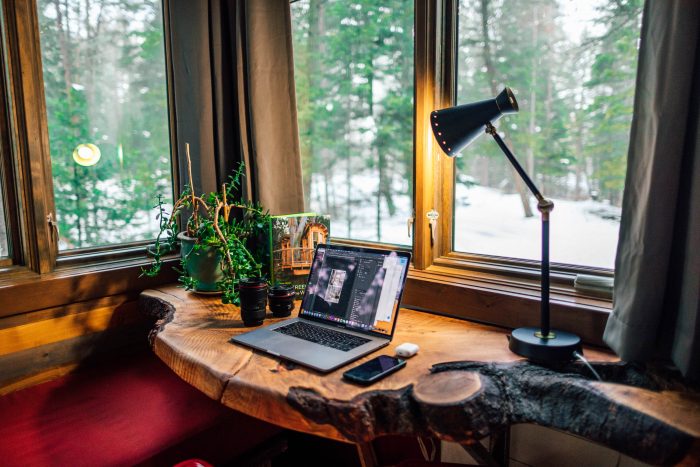
The first thing you need to do is decide on the area that is going to serve as your office. Now, this can become a bit tricky, especially if you don’t have much room to do so, but not impossible.
Ideally, especially if you don’t live alone, your office should be in a separate room in the house, where kids or other family members don’t have access. This way, you will be able to get some privacy while working by just locking the door and pretending you are not even home. Now, the size of the room depends highly on the type of business you are running. Programmers and writers, for example, need nothing else but a small desk to set up their computers.
If you have a large backyard, consider building a granny annex that you can use as your office. In Victorian England, granny annexes were separate buildings, independent from the main house, where widows of the homeowners were relocated, once their children moved into the main house with their family. Now, granny annexes can be used for many purposes, such as inviting your elder relatives to stay with you, turning it into a guest house, renting it, or turning it into your home office. They usually have one bedroom and one living room area, where you can meet with clients, and being able to meet clients in a proper sitting area that does not double as your living room will make you look that much more professional.
Step #2: Make a list of supplies
After deciding where in the house your new office will be, it’s time to start making a list with all the necessary office supplies. This includes furniture, stationery, and equipment, which we will be discussing in a bit.
Now, the list of necessities depends highly on the type of business you are running. Freelance writers, web designers and developers may not need more than a small desk, a comfortable chair, and good lighting, but if your job requires you to keep files, you will need to incorporate file cabinets as well.
Before even beginning to make the list, think of a budget and stick to it. Start with the necessities, then work your way towards the rest of the list, as you may end up with a really expensive and good-looking desk, but a slow and outdated computer.
If you have more rooms to spare, such as with granny annexes, perhaps try to create two separate places: one for meeting clients, and one to act as the actual office. For the meeting room, a couch and a coffee table should be all you need.
Step #3: Choose the right equipment
Now, this is what you will probably be spending most of your budget on, but without proper equipment, working from home will be nothing but dreadful, because there is no one else you can count on. In a traditional office, if your printer stops working, you can easily run to a colleague to print things out. At home, you don’t have that luxury.
The first thing you should be investing in is a good computer, that won’t decide to stop working when you need it most. Then, a fast Internet connection should be second on your list. Depending on what your job is, you may also need to invest in additional software and hardware.
Don’t splurge on furniture and décor, no matter how tempting it may be, as they can be easily upgraded later. Investing in technology that will help you deliver top results in your business field should be your top priority.
Step #4: Take care of the small details
Now, for the fun part. After making sure you have all you need to properly run your business, you can take what’s left of your budget and spend it on really making the place your own. After all, you will be spending at least 8 hours a day in there, so you might as well make it comfortable.
Decorate it however you want, surround yourself with stuff that boosts your productivity, and don’t be afraid to take things to the next level. The only thing you need to make sure of is that everything goes with your brand image, especially if you are meeting clients there.
If the budget allows, you can also invest in some other office appliances, to make your stay there as comfortable as possible. A coffee machine and a minifridge to store water or snacks can be a nice addition, especially if clients need to stop by. A little speaker to animate the place and listen to music while working can also make a real difference.
Now that you have everything set up and you are ready to start working, it’s time to give your family a tour and sit them down for a quick chat about boundaries. This is especially important if you have kids so that they can understand that, despite you being at home all day, there are certain moments when they can’t interrupt your schedule unless it is an emergency. Remember that the key to successfully running a business from home is keeping your personal and professional life as separate as possible.
Find a Home-Based Business to Start-Up >>> Hundreds of Business Listings.