“You don’t need hours of drills—just the right sequence and a kid-sized bike.”
— Jenn Thomas, PTA-Certified Pediatric Therapist
Why This Guide Belongs on Your Home-Office Desk
Running a business from home leaves little time for marathon practice sessions at the park. The American Academy of Pediatrics (AAP) and recent motor-learning studies show that kids who learn balance first, pedals second ride confidently 40% faster than those who start on training wheels. Stick to the steps below and most three- to seven-year-olds can master two wheels by Sunday—without you missing Monday’s client calls.
(Helmet on, please. Every rider, every session—pads are a smart add-on if your child is nervous.)
1. Skip Training Wheels—Balance Bikes Win Every Time
Training wheels steady the bike, not the rider. A 2024 meta-analysis in the Journal of Functional Morphology & Kinesiology found that balance-bike starters reached independent pedaling 22 months sooner than training-wheel starters.
Action step: Start on a pedal-free balance bike (or remove pedals from a small pedal bike). The brain solves balance first, so total practice time shrinks from months to minutes.
Mini anecdote: My five-year-old niece wobbled for weeks on training wheels; after one afternoon on a balance bike she was gliding the driveway—no side wheels, no tears.
2. Three Five-Minute Micro-Drills (Total: 15 Minutes)
| Mini-Game | Builds | Time |
| Scoot & Stop | Braking reflex | 5 min |
| Glide & Count | Dynamic balance | 5 min |
| Figure-8 Drift | Steering finesse | 5 min |
Short bursts fit neatly between Zoom meetings and keep kids excited instead of exhausted.
How to Run Each Drill
- Scoot & Stop – Child straddles the bike, walks (scoots) forward a few yards, then plants both feet flat to stop. Builds an automatic braking reflex.
- Glide & Count – From a small push, your child lifts both feet and counts aloud “one-two-three” while gliding. Stretch the count a bit farther each try to reinforce balance.
- Figure-8 Drift – Set two cones (or water bottles) six feet apart. Your child glides around them in a wide figure 8, learning gentle leaning and steering control that translates directly to pedal turns.
(Tip for worried kids: Let them practice walking the bike indoors first—confidence often blooms in a hallway.)
3. Hands Off the Saddle—Let Them Lead
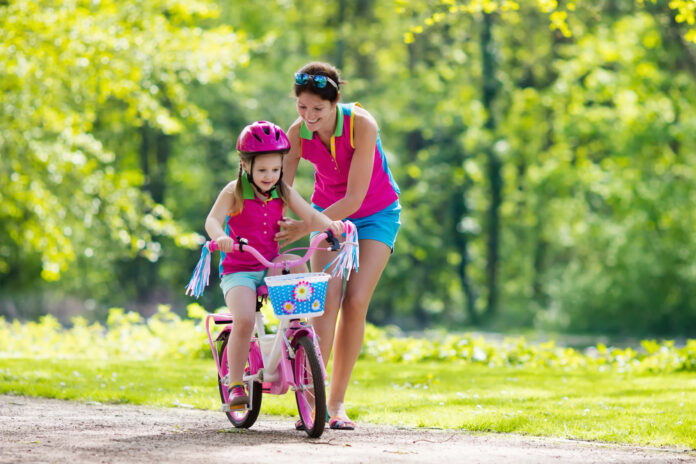
A Frontiers in Psychology review shows learners progress fastest when they control their own movement. Stand close, but avoid holding the seat or bars. Say “I’m right here” rather than “Let me steer.” The wobbles they correct themselves hard-wire real riding reflexes.
4. Size Matters More Than You Think
Nothing stalls progress faster than a bike that’s too big or heavy. The AAP warns: “Oversized bikes are especially dangerous; children may lose control and crash.” Use this five-point fit check:
| Checkpoint | Why It Matters | Quick Rule |
| Flat-Foot Fit | Confidence at starts/stops | Both feet flat while seated |
| Weight | Easy handling | ≤ 30 % of child’s body weight |
| Seat Range | Growth room | Lowest setting ≈ inseam – 1″ |
| Hand Brakes | Safer stopping | Introduce by age 5–6 |
| Low Step-Through | Easy mount/dismount | Top tube well below inseam |
Need a shortcut? Most anatomically engineered kids’ bikes list seat-height and standover specs right on the product page. For instance, every model on the Biky Bikes website shows recommended inseam ranges beside the “Add to Cart” button—one scroll and you know whether it fits.
5. Add Pedals When Glides Reach 8–10 Seconds
Once your child can coast the length of a driveway, attach pedals or switch bikes. Teach the power-start position—right pedal at two o’clock—for instant momentum. Practice smooth hand-brake stops on flat pavement before adding turns or gentle hills.
6. Common Pitfalls (and Fast Fixes)
- Buying a “grow-into-it” bike – Too tall, heavy, intimidating.
Fix: choose the size that fits now. - Marathon practice sessions – Fatigue → frustration.
Fix: cap sessions at 10–15 minutes. - Over-coaching every wobble – Blocks self-correction.
Fix: cheer, don’t steer.
Weekend Timeline at a Glance
- Sat AM (30 min): Balance-bike drills (Scoot, Glide, Figure 8).
- Sat PM (20 min): Free play on the bike—no agenda.
- Sun AM (20 min): Add pedals; practice power starts plus braking.
- Sun PM (15 min): Mini loop around the block to lock in skills.
Total structured time: about 1.5 hours spread over the weekend.
Final Takeaway
Teaching your child to ride doesn’t require endless hours—just the right skill order, a hands-off coaching style, and a bike that truly fits. Nail those three and you’ll trade wobbling tears for triumphant shouts of “Look, I’m riding!” in a single weekend—leaving plenty of bandwidth for Monday’s to-do list.
Find a Home-Based Business to Start-Up >>> Hundreds of Business Listings.


