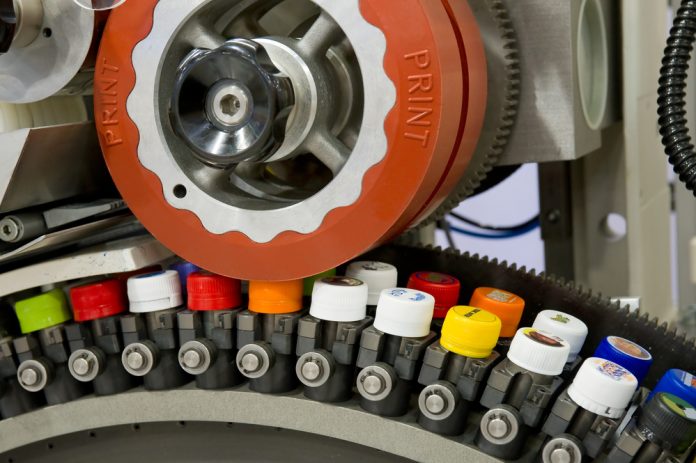
If your business involves transferring two-dimensional images onto three-dimensional objects and you’re still using a screen printing process to do this, you need to know about pad printing. In a nutshell, pad printing consists of using an indirect offset (gravure) process to transfer your image from your cliché (image plate) to your object (substrate) by means of a silicone pad.
Pad printing, also called tampography, is perfect for printing on products that are difficult to print on. Consequently, many industries, including the following, use it:
- Medical
- Automotive
- Promotional
- Apparel
- Electronics
- Appliances
- Sports equipment
- Toys
Thanks to the unique properties of the silicone pad(s), pad printing can pick up your image from the flat surface of your cliché and easily transfer it to whatever substrate(s) you may have, including those with the following surfaces:
- Flat
- Cylindrical
- Spherical
- Compound angles
- Textured
- Concave
- Convex
The Pad Printing Cycle
The pad printing process has six steps as follows:
- Starting from its home position on your pad printer, your sealed ink cup containing your chosen color of ink sits over your printing plate’s etched artwork area, covering your image and filling it with ink.
- Your ink cup then moves away, taking all the excess ink with it, thereby revealing the etched image, now filled with ink. The top ink layer becomes tacky almost immediately, allowing the ink to adhere to the transfer pad and then to your substrate.
- Your transfer pad now quickly presses down on your printing plate. As the pad compresses, it pushes out air and makes your ink lift (transfer) from the etched artwork area onto itself.
- After this quick press down, your transfer pad lifts up, taking the tacky ink film inside your etched artwork area with it. Only a small amount of ink stays in your printing plate.
- While your transfer pad moves forward, your ink cup also moves so as to cover your printing plate’s etched artwork area. Once more, your ink cup fills your etched artwork image, preparing it for the next print cycle.
- Your transfer pad compresses down onto your substrate, transferring its ink layer that it picked up from your printing plate onto your substrate’s surface. Once this transfer is complete, the transfer pad returns to its home position, completing the pad printing cycle.
Pad Printing Advantages
When you create the promotional products for your business’s brand, you want to use a printing method that gives you the most bang for your buck, i.e., high-quality, cost-effective printing that resists fading over time. This is exactly what pad printing does for you.
In addition to allowing you to print on virtually every substrate shape, including textured ones, pad printing also allows you to transfer your 2D image onto delicate and mechanically sensitive products. And here’s the kicker. The resolution you achieve with pad printing is far superior to that which you get with silk screening.
But as every business owner knows, your bottom line is money. Consequently, you’ll be glad to know that pad printing set-up costs are fairly low. Furthermore, your pad printing equipment will take up only a relatively small amount of room, and you and your employees can easily learn the pad printing process.
Pad Printer Models
When shopping for pad printers, you will find that they come in a variety of models, including these:
- Economy
- Industrial
- Turbo
- Alien
- High speed
- Industrial/Servo
- Multi-Axis CNC
- Green Machines
Parts, Supplies and Accessories
Regardless of model, all pad printers include the following three main parts:
- Image plate (cliché)
- Ink
- Rubber-molded silicone pads
Pad printing requires few supplies, such as the following, to keep your pad printer running at top production:
- Printing plates
- Ink cups
- Printing pads
- Doctor blades
- Ink trays
- Cup washers
You will also likely want a dead on light box to pre-register your image(s) on your pad printing plate(s). This makes for quick and effortless plate changes and helps with your multi-color set-ups. You will also likely want a reconditioning kit with a high-grade tool steel surface lapped to a micro finish. These kits come in the following three sizes:
- 180 mm x 350 mm
- 150 mm x 300 mm
- 150 mm x 180 mm
Pad Printing Plates
Steel and polymer make up the two main types of plate (cliché) materials, each of which has its own advantages. Steel plates are the preferred material for longer runs, long-life thin steel is best for medium to long runs, and thicker steel is recommended for very long production runs. Polymer plates, on the other hand, are easy to use and best suited for short to medium production runs.
Pad Printing Inks
In general, most pad printing inks come in one of two categories: solvent-based (cured with time and/or heat) and UV-based (cured quickly with UV light). Naturally, the exact type of ink you will need will depend on what substrate material(s) you intend to place your 2D image(s). For instance, if you’re printing it on candy or other edible products, you will need food-grade inks. If you’re printing it on medical products, you will need medical-grade inks. Other than specialized applications such as these, you will want inks that best adhere to your substrate material, whether that be glass, aluminum, plastic, etc.
Pad Printing Pads
All pad printing pads are molded silicone rubber. They come in a nearly infinite variety of shapes, sizes, and hardness, so you can pick the pad type that best fits your needs. Remember, your printing pads easily adapt to your substrate’s shape. In addition, your pads’ hardness (durometer) lets you optimize your pads for such jobs as printing fine detail on delicate electronics or printing large images on uneven substrates.
All in all, pad printing represents the new age of printing, one that gives you superior quality while reducing your overall printing costs.
Find a Home-Based Business to Start-Up >>> Hundreds of Business Listings.


