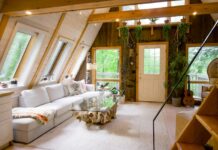
Accessory dwelling units (ADUs) are separate living units sharing land with a single family home. This housing solution can serve as sleeping quarters for extended family or adult children. Or you can rent it out and get some extra income, given people’s recent interest in affordable housing. You can also use this space for your home business, whether an office or workspace for creative pursuits like art, music, or painting.
An ADU provides a distinct separation between living spaces and workspaces, which helps reduce distractions from household activities and helps you focus. It also enhances professionalism and brand identity, especially if you have to meet with collaborators or clients.
It helps to know what steps to take during ADU construction so the project is successful. Find below a detailed breakdown of these steps.
1. Assess Feasibility
Your first port of call when building an ADU is assessing whether the project can actually be completed. Start with zoning rules to ascertain ADUs are allowed on your property. Some areas have restrictions on such additional structures to ensure density limits aren’t exceeded. Other areas have limits on how tall and big an ADU can be.
Another thing, assess the slope and elevation of your property. Steep slopes may significantly increase the costs. Also, check soil quality and drainage capabilities as poor soils can make it challenging to set up new structures, setting back ADU
If utility companies have the right to use a portion of your property, you may not be able to build in these areas. Also, you may need to upgrade your water, sewer, and electrical systems to accommodate the additional load from the ADU. Consider the costs and logistics of connecting to these systems to ensure your ADU project comes to a successful completion.
2. Decide On The Type Of ADU
There are different types of ADUs you may want to consider, as outlined below:
- Detached ADUs: These stand-alone separate from the primary residence on a property. They’re independent units, usually located in the backyard or on the side of the main house.
- Attached ADUs: An attached ADU is physically connected to the main house. They share at least one wall with the primary residence but have their own facilities like bathroom, kitchen, and entrance.
- Garage or basement conversion ADUs: These involve transforming existing garage space into a fully functional living unit. It’s popular for homeowners seeking to maximize the use of their property without the need to build an entirely new structure.
- Internal ADUs: These are created within the existing layout of a primary residence. typically, you convert non-living spaces such as basements, attics, or large storage areas into self-contained living units.
Further, you have to choose between prefab ADUs and stick-built ADUs. Stick-built ADUs can take about 8 to 16 months to complete, while prefabs can be done in as little as one month. Both options cost more or less the same amount. One downside of prefabs is the limited design options. Your decision will depend on how fast you want the structure completed and your desired design.

3. Design The ADU
After deciding on the ADU type, the next step in the building process is to design. Start with site measurement. Visit the proposed build location and take measurements of the existing structures. This will help you precisely position the ADU.
Next, determine the exterior dimensions of the structure to ensure you don’t go beyond size restrictions. With the exterior dimensions, you can complete the floor plan using an appropriate design tool and calculate how many square feet the unit will be. You’d also want a 3D render to see how the structure will look in real life. Professional designers can help you with this process, completing all required drawings.
4. Get The Necessary Permits
The next step is submitting the necessary drawings, calculations, and required documents to the local authorities for building permit application. They’ll review the plans and if need be, send them back with instructions on how to amend them to be compliant with the local building code and regulations. You’ll also need to get clearance from water, sewage, and power companies. Once the plans go through final review, you’ll get the necessary permits.
To note, you’ll be required to pay various plan checks and permitting fees depending on the size of your unit.
5. Hire A Contractor
Once you get the permits, you’re ready to start building. Of course, you can do it yourself if you’re knowledgeable and experienced in building. If not, you’d want to find a qualified contractor, preferably one that specializes in ADUs.
Before contacting any contractor, have a detailed plan for your ADU. This will ensure your contractor doesn’t adjust prices upwards by claiming they weren’t aware of the actual scope.
Next, shortlist two or three high-potential contractors and assess them through factors like online reputation, whether they’re specialized in ADUs, their track record of successful ADU projects, whether they’re licensed and insured, and familiarity with local ADU laws and regulations. Get quotes from the shortlisted companies, compare them and choose the best value for money.
Conclusion
Building an accessory dwelling unit on your property takes a profound understanding of the local regulations and typical steps to take, as outlined herein. With this knowledge, you can successfully expand your living space. Carrying out your home business away from your primary residence infuses some level of professionalism while saving you from typical household distractions. Your winning point is working with professionals who have the necessary expertise to erect a decent structure.
Find a Home-Based Business to Start-Up >>> Hundreds of Business Listings.


